
homeLab Project Documentation
This is my documentation for the “homeLab” project. Here you will be able to configure your Raspberry Pi to be a server of very useful services in the day to day like for example: Samba, Bitwarden…
If there is any doubt or error in the documentation, do not hesitate to contact me: Instagram
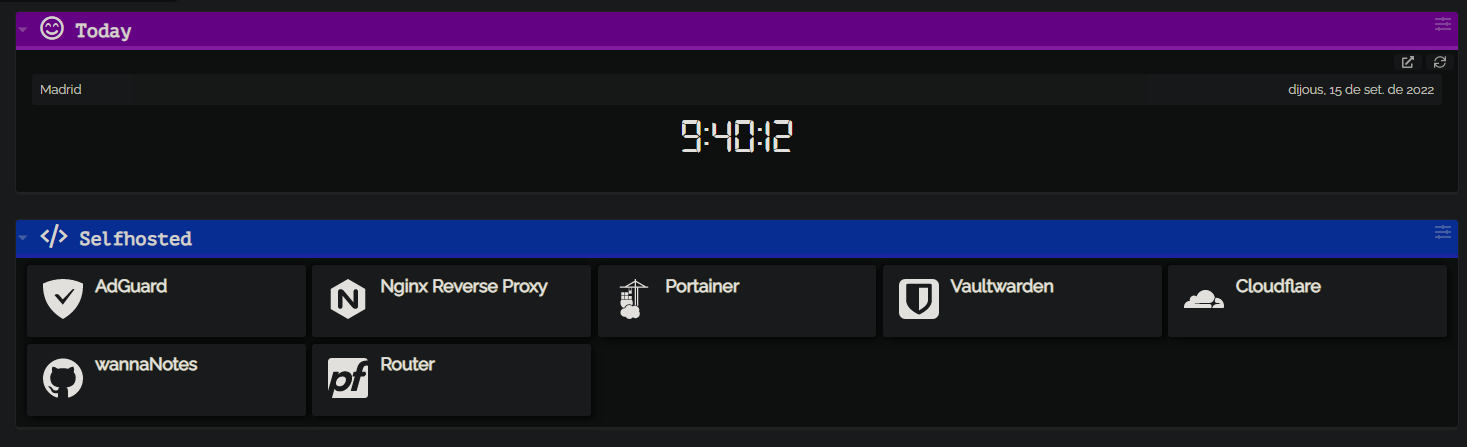
Table of Contents
- Initial Configuration
- PiVPN
- AdGuard Home
- Docker + Portainer
- Cloudflare DDNS
- NGINX Reverse Proxy
- Vaultwarden
- Samba
- Dashy
- Further Investigations
- Sources
Initial configuration
Since these steps are fairly simple, I will give a short summary of my process before installing anything:
- Install O.S. to the Raspberry Pi.
- Execute my Post Installation Script
- Assign static IP address to the Raspberry in your Router.
Install and Configure PiVPN
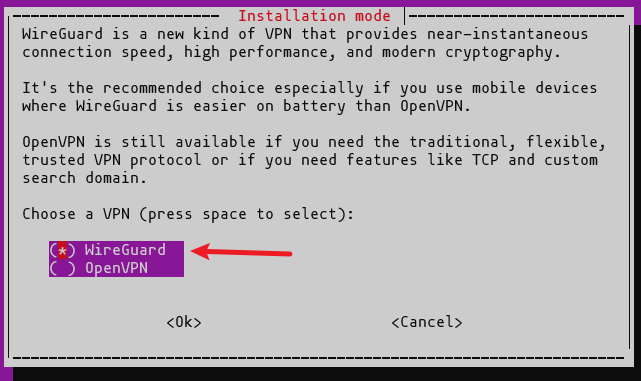
PiVPN is a free and open-source software suite that sets up a VPN server using OpenVPN server software. It has been designed specifically to run on a low-cost Raspberry Pi.
1.. Now executhe the following commands:
1
2
3
4
5
# Update the system
sudo apt update -y && sudo apt upgrade -y
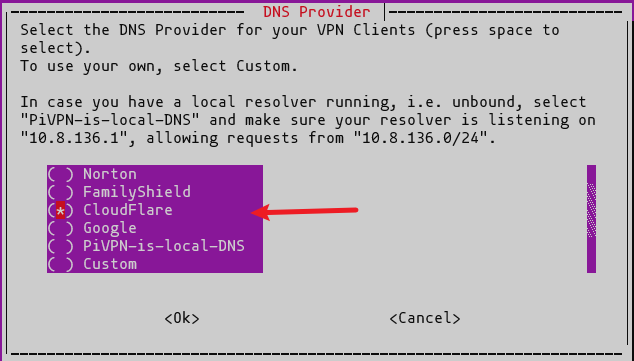
# Install PiVPN
curl -L https://install.pivpn.io | bash
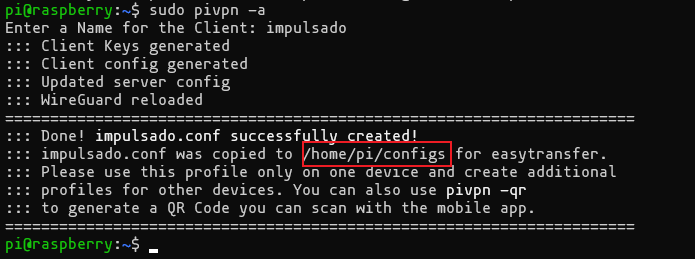
2.. Create a new user and copy the file to the device we want to use it.
You can use WinSCP to copy files.
1
2
3
4
5
# Create user
sudo pivpn -a

# Change permissions to the directory
sudo chown -R pi:pi ~/configs
3.. To make this work, we need to create a new Port Forwading rule in our Router: 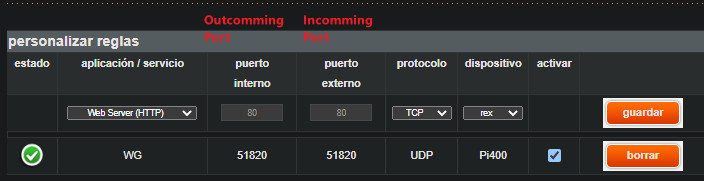
Install and Configure AdGuard Home
AdGuard Home is a network-wide software for blocking ads & tracking. After you set it up, it’ll cover ALL your home devices, and you don’t need any client-side software for that. It operates as a DNS server that re-routes tracking domains to a “black hole”, thus preventing your devices from connecting to those servers. It’s based on software we use for our public AdGuard DNS servers, and both share a lot of code.
1.. Execute the following command to install AdGuard Home:
1
curl -s -S -L https://raw.githubusercontent.com/AdguardTeam/AdGuardHome/master/scripts/install.sh | sh -s -- -v
2.. Navigate to AdGuard Home Administrator Dashboard and finish the setup. (IP:3000) 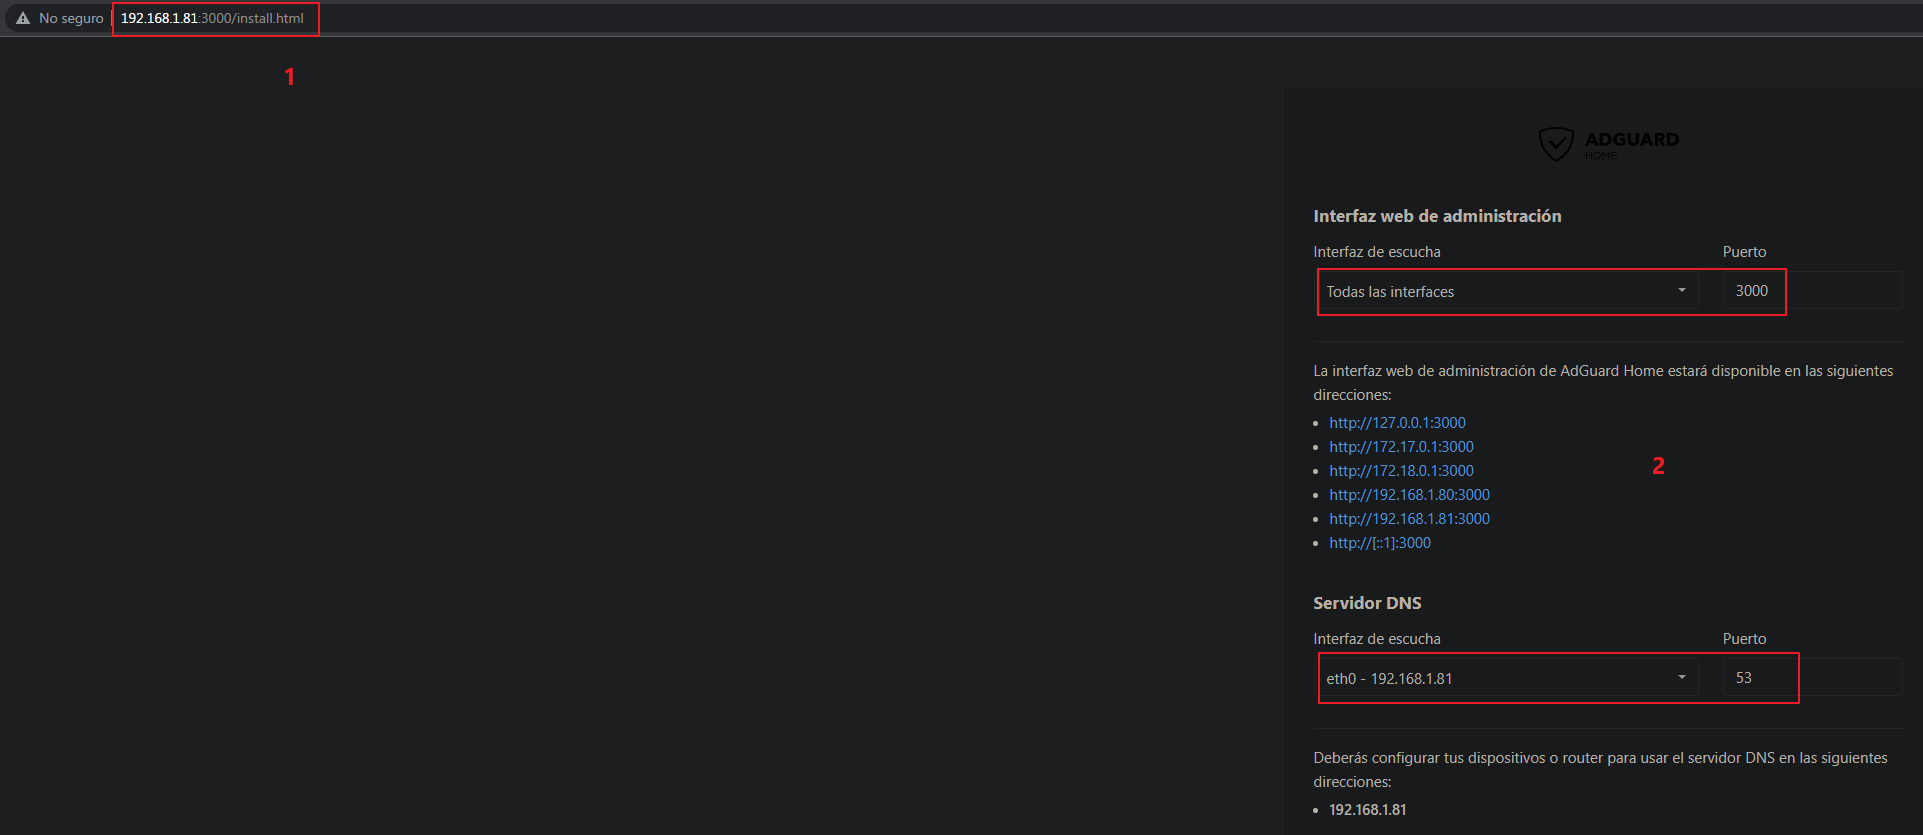
3.. Now it’s time to configure AdGuard Home. First, we will setup our device and test that AdGuard is working properly. To configure your device, navigate to “Setup Guide” in the Header. 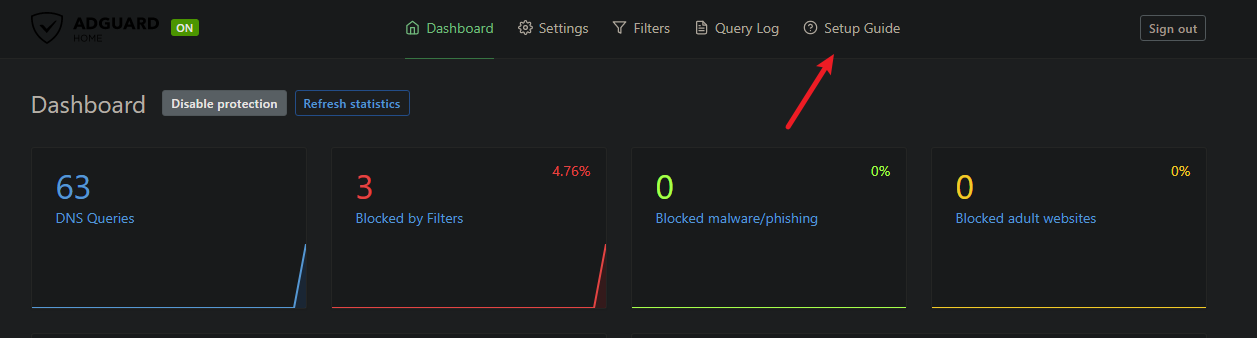
4.. Once we have checked that, at least, one device is working properly, we will add more blocklists to the filter. Navigate to: Filters > DNS Blocklists > Add Blocklists > Choose from the list. 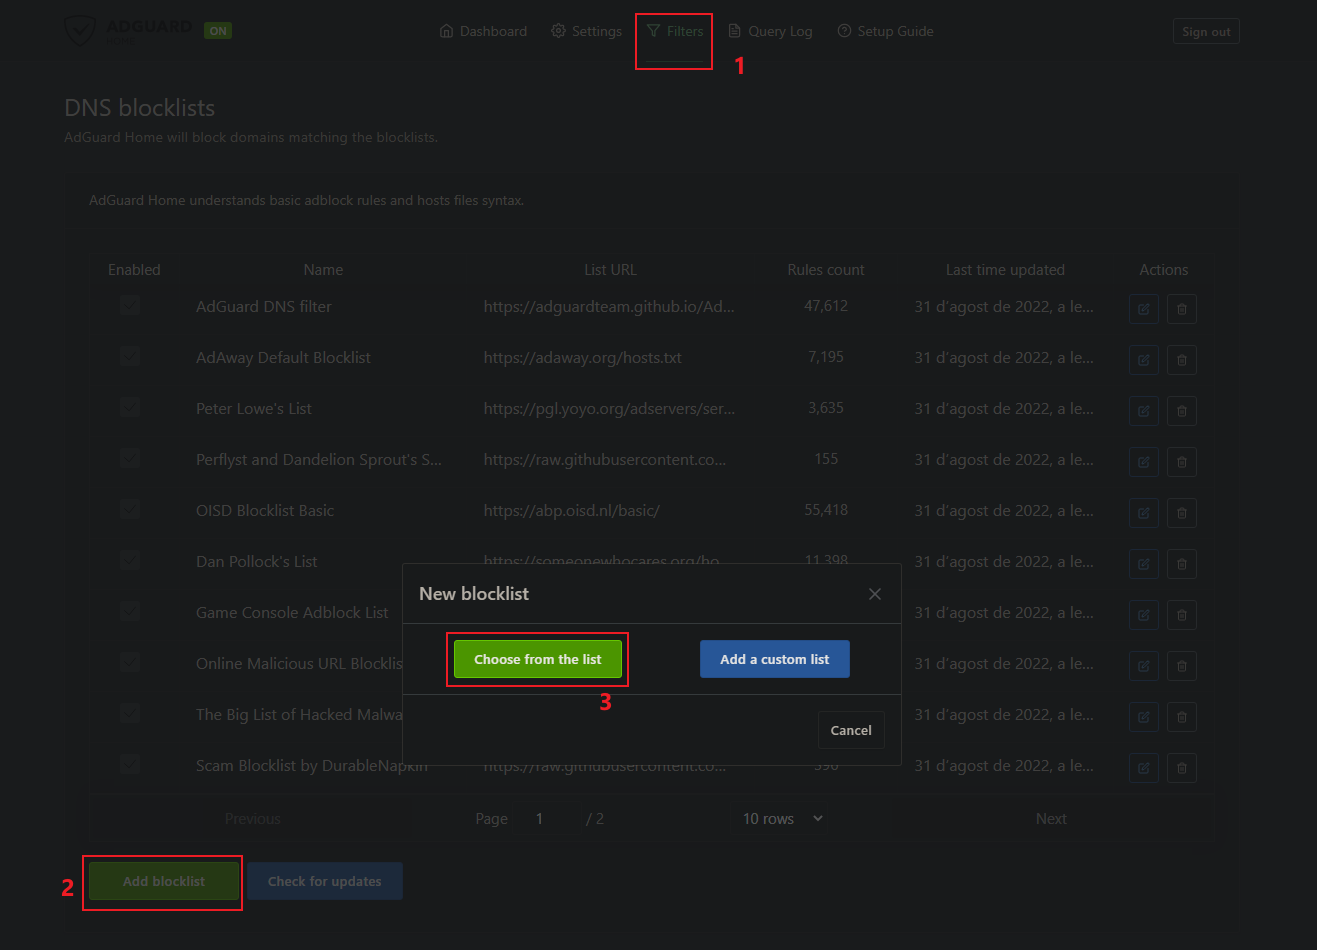
5.. Select all the options and click Save.
If you want more domains, you can visit this web and copy those URLs into your Blocklists filter.
Install and Configure Docker & Portainer
Most of this project is based on a program called Docker, so the first step will be to install it along with Portainer in order to manage it.
Docker packages software into standardized units called containers that include everything needed for the software to run, including libraries, system tools, code and runtime.
More information link.
1.. Execute the following commands:
1
2
3
4
5
6
7
8
9
10
11
12
13
14
# Update the system
sudo apt update -y && sudo apt upgrade -y

# Install Docker
curl -sSL https://get.docker.com | sh

# Enable Docker
sudo systemctl enable --now docker

# Give user permissions to Docker (pi=my username)
sudo usermod -aG docker pi

# Install Portainer
sudo docker run -d -p 9000:9000 -p 9443:9443 --name=portainer --restart=always -v /var/run/docker.sock:/var/run/docker.sock -v portainer_data:/data portainer/portainer-ce:latest
2.. Once installed, open your web browser and navigate to the Protainer Dashboard. To do that, you will need to write down the IP:Port. In out case, port is mapped to 9000. 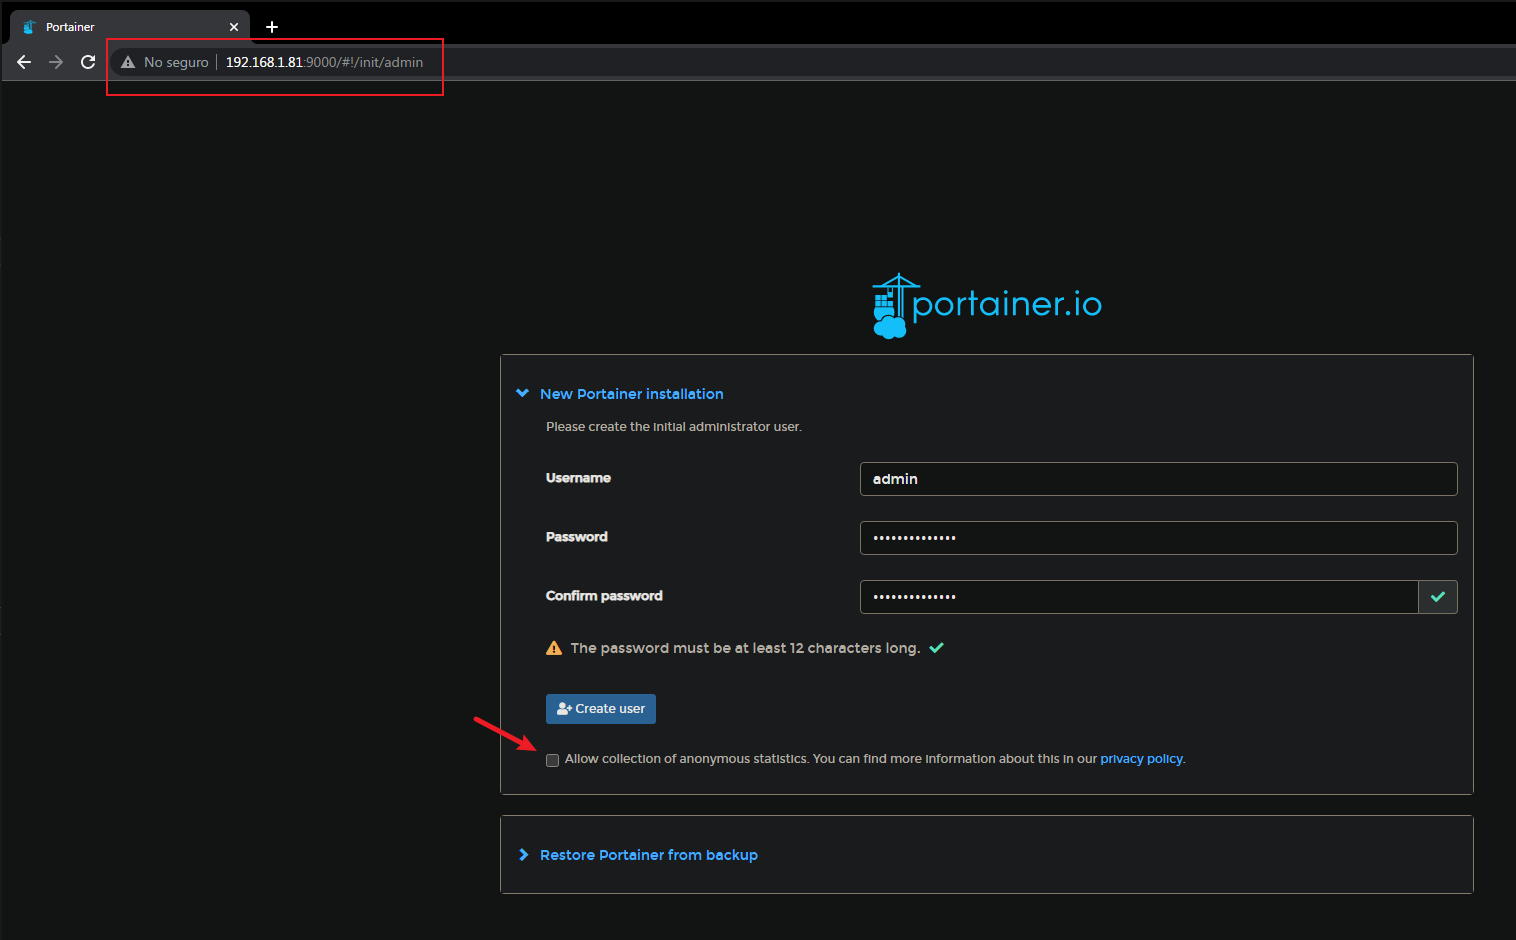
3.. Before installing anything else, let’s change the templates shown in “App Templates”. To do that, you will need to change the URL to https://raw.githubusercontent.com/pi-hosted/pi-hosted/master/template/portainer-v2-arm64.json 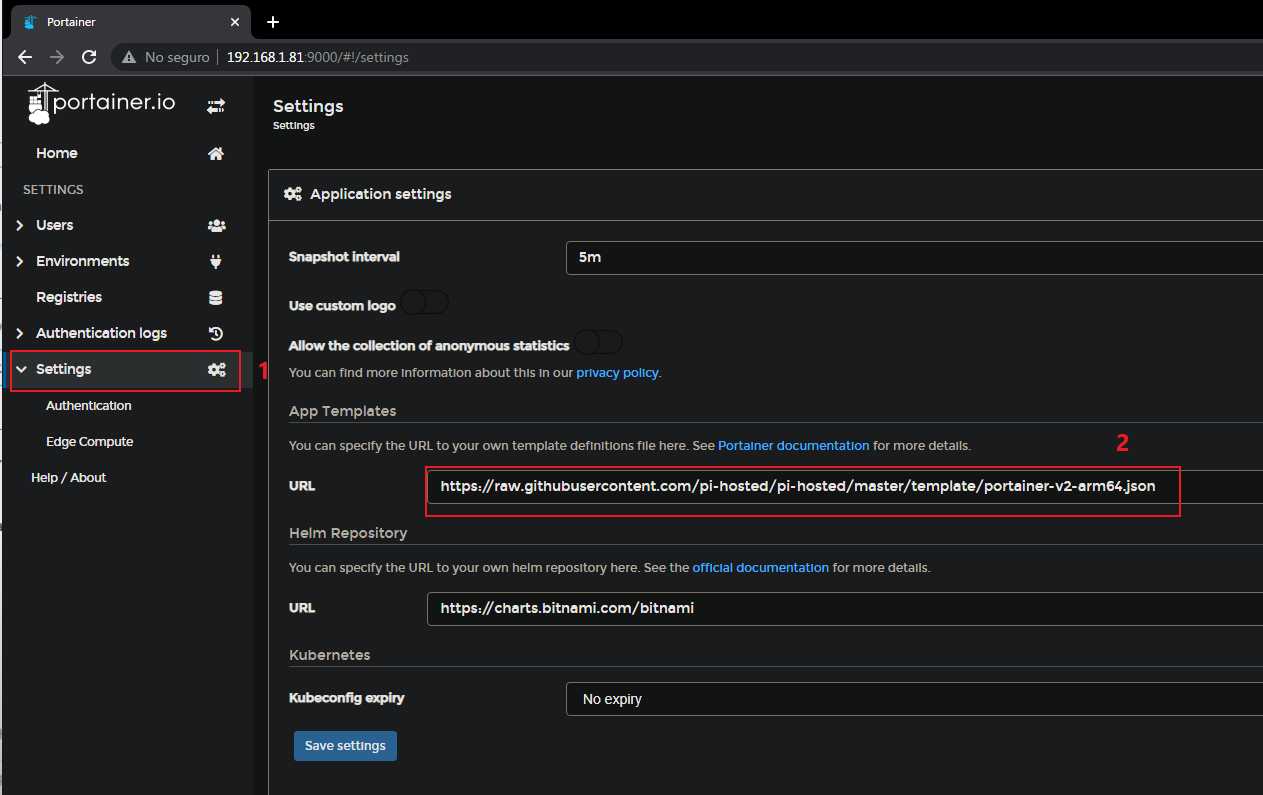
4.. Finally, let’s configure the IP to which the shortcuts will open to point to the raspberry pi (192.168.1.81) and not to its local one (127.0.0.1). Navigate to Environment > local. In Public IP, write down Raspberry Pi IP. 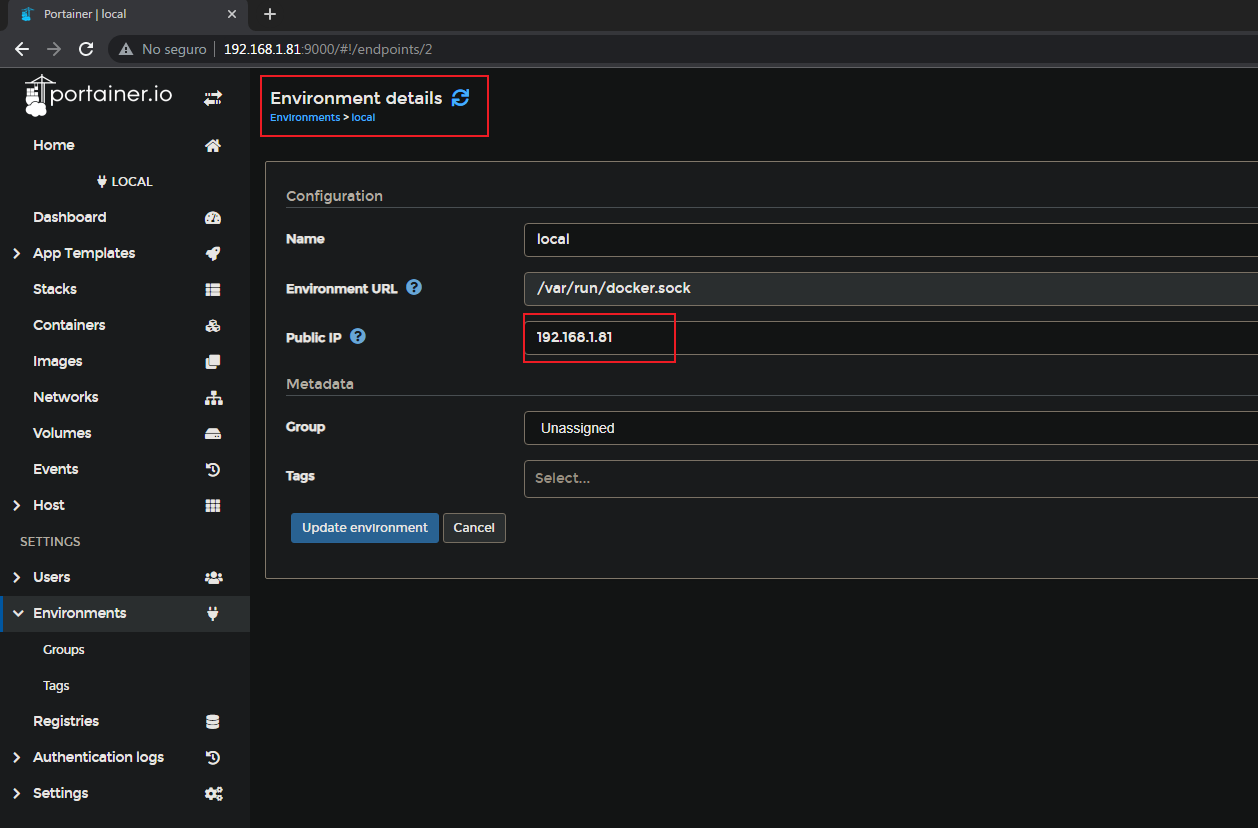
Install and Configure Cloudfare DDNS
Dynamic DNS (DDNS) is a service that keeps the DNS updated with a web property’s correct IP address, even if that IP address is constantly being updated.
More information Link
1.. Open Cloudfare dashboard and create a new API Token. Link
2.. Create a new Token > Create Custom Token.

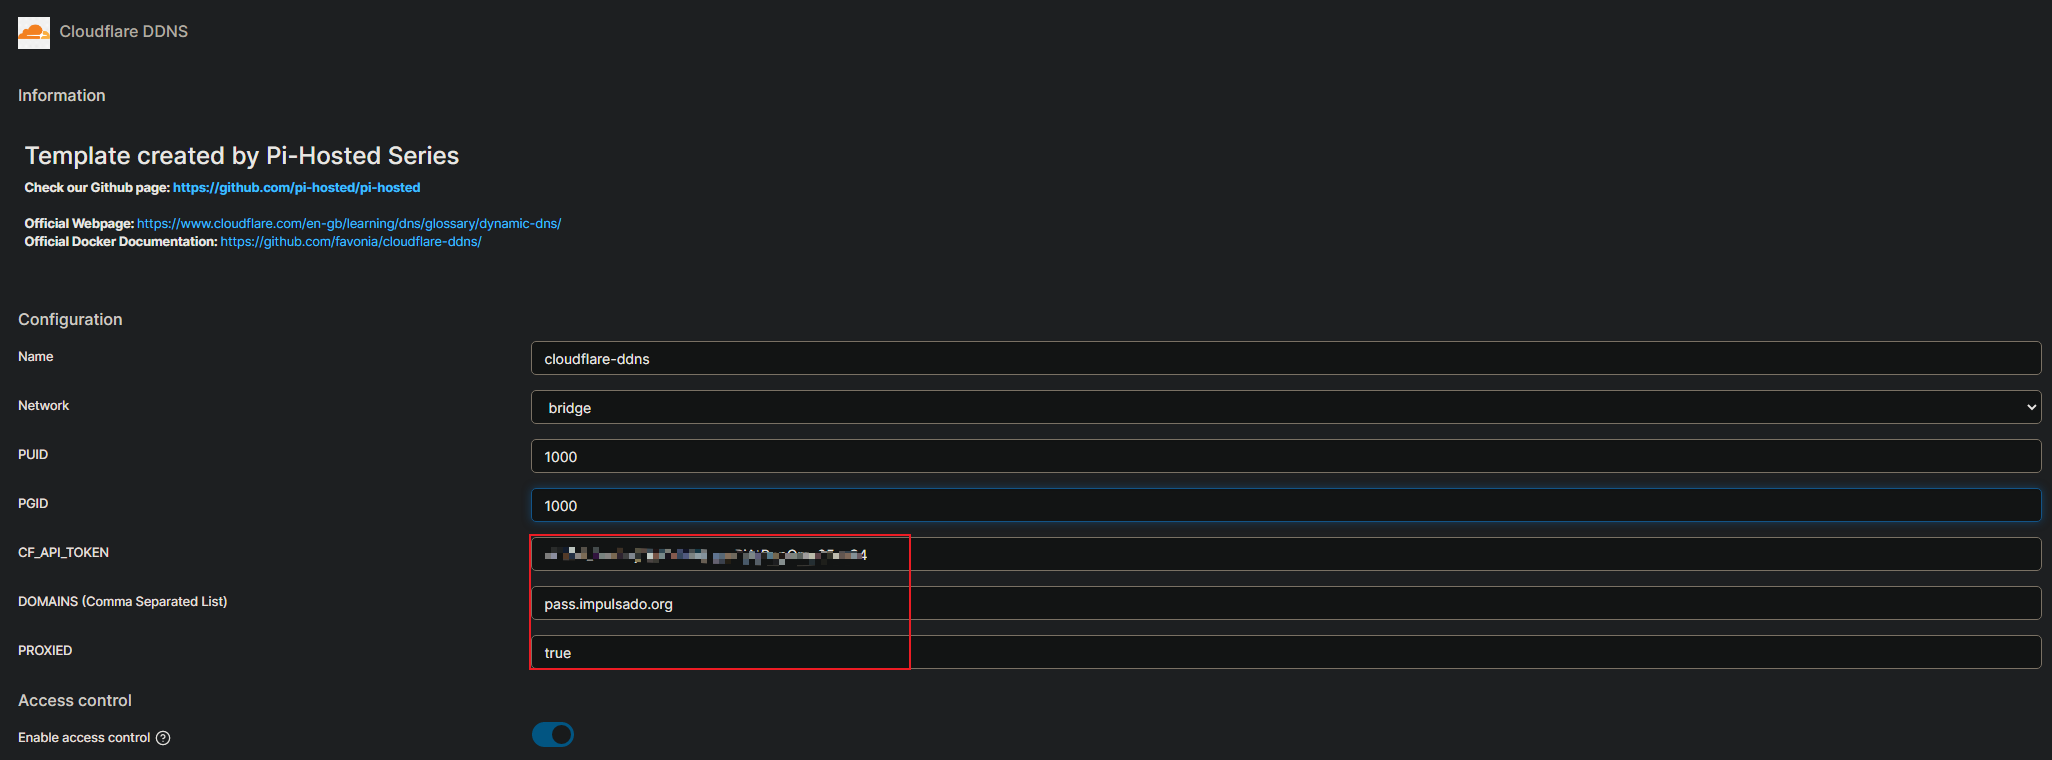
3.. From the Templates list, select Cloudfare DDNS and configure it:
4.. Finally, check in Cloudfare that we can see our “local” entry pointing to our Public IP.
We must change the option to DNS Only because we will use NGINX in the future.

Install and Configure NGINX Reverse Proxy
The Nginx proxy manager (NPM) is a reverse proxy management system running on Docker. NPM is based on an Nginx server and provides users with a clean, efficient, and beautiful web interface for easier management. The tool is easy to set up and does not require users to know how to work with Nginx servers or SSL certificates.
More information Link
1.. Create the directory and a yaml file inside with this content:
1
2
3
4
5
6
7
8
9
10
11
12
version: '3'
services:
  app:
    image: 'jc21/nginx-proxy-manager:latest'
    restart: unless-stopped
    ports:
      - '80:80'
      - '81:81'
      - '443:443'
    volumes:
      - ./data:/data
      - ./letsencrypt:/etc/letsencrypt
2.. After creating this file, bring up the stack.
1
sudo docker-compose up -d
3.. Login into Admin UI (IP:81) and end the configuration.
1
2
Email:    [email protected]
Password: changeme
Install and Configure Vaultwarden
Bitwarden is a free and open-source password management service that stores sensitive information such as website credentials in an encrypted vault. The Bitwarden platform offers a variety of client applications including a web interface, desktop applications, browser extensions, mobile apps, and a command-line interface.
More information Link
0.. Create 2 Forwarding rules in your router (HTTP & HTTPS).
1.. Create the directory and a yaml file inside with this content:
1
2
3
4
5
6
7
8
9
10
11
12
13
14
15
16
17
18
19
20
21
22
23
24
version: '3'

services:
  vaultwarden:
    restart: unless-stopped
    container_name: vaultwarden
    image: vaultwarden/server:latest
    volumes:
      - ./vw-data/:/data/
    ports:
      - 8062:80
    environment:
      - LOGIN_RATELIMIT_MAX_BURST=10
      - LOGIN_RATELIMIT_SECONDS=60
      - DOMAIN=https://pass.impulsado.org           # CHANGE THIS
      - ADMIN_TOKEN=P@ssword                        # CHANGE THIS
      - SIGNUPS_ALLOWED=false
      - SIGNUPS_DOMAINS_WHITELIST=example.com       # CHANGE THIS
      - SIGNUPS_VERIFY=true
      - SIGNUPS_VERIFY_RESEND_TIME=3600
      - SIGNUPS_VERIFY_RESEND_LIMIT=6
      - EMERGENCY_ACCESS_ALLOWED=true
      - SENDS_ALLOWED=true
      - WEB_VAULT_ENABLED=true
2.. After installing it, access to portainer and add the Vaultwarden container to the NGINX network. 
3.. Now access to NGINX dashboard and create a new Certificate to the Vaultwarden container. Navigate to: SSL certificate > “Add SSL certificate” 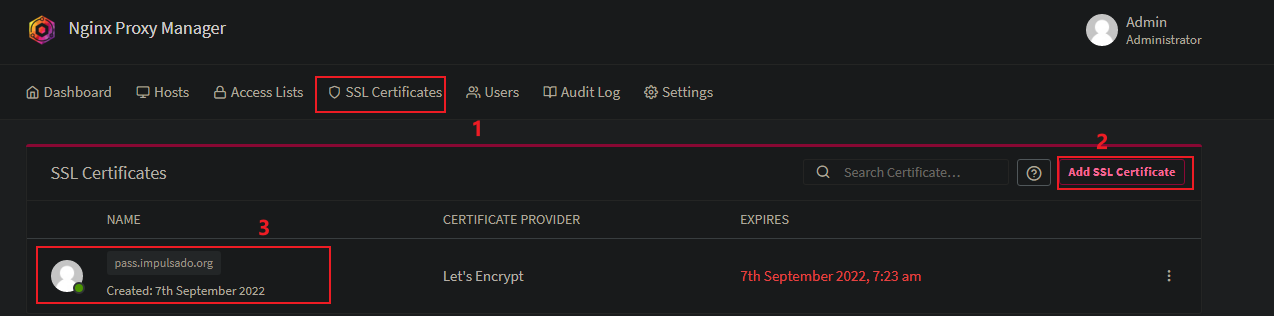

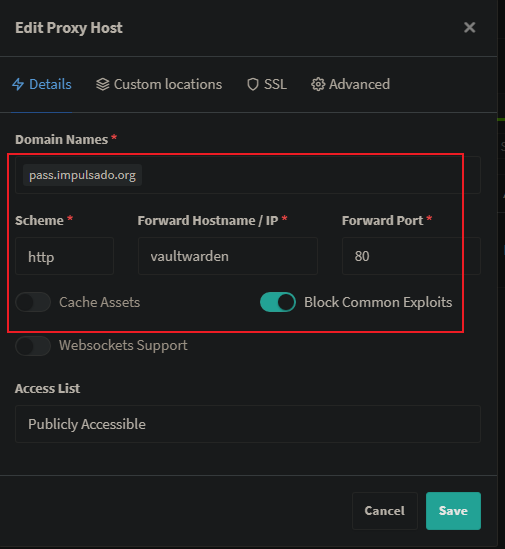
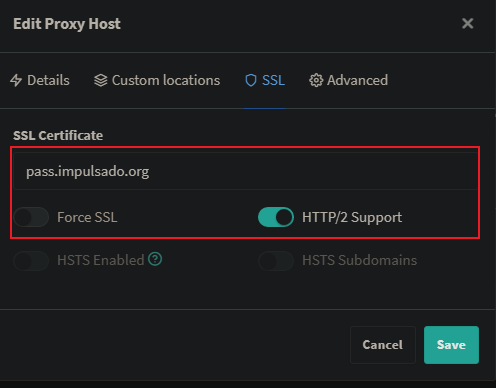
4.. Now add a new “Proxy Host”.
5.. Finally, access to the website and create an account. Remember that the email domain must be one of the previously authorized ones. (e.g. example.com = [email protected]).
6.. If you want to configure Vaultwarden more extensively, you can go to “pass.domain.com/admin”.
Install and Configure Samba
Samba is an open-source software suite that runs on Unix/Linux based platforms but is able to communicate with Windows clients like a native application. So Samba is able to provide this service by employing the Common Internet File System (CIFS).
More information Link
1.. Mount the external storage.
1
2
3
4
5
6
7
8
9
10
11
12
13
14
# List all disks and search for the onw you want to mount.
sudo fdisk -l

# Create the folder where the disk will be mounted.
sudo mkdir /mnt/<name-of-the-drive>

# Edit /etc/fstab
UUID=<uuid-of-your-drive>  <mount-point>  <file-system-type>  <mount-option>  <dump>  <pass>

## EXAMPLE
UUID=0792EAD8-DE83-4D3B-A031-DE16CF8AF399 /mnt/sda1 ext4 defaults 0 1

# Save the config and close the file.
sudo mount -a
2.. Open Portainer and search for Samba template.
3.. Configure Samba template like this: 
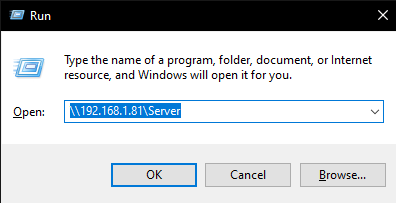
4.. Wait a little bit and try to connect to Samba:
Install and Configure Dashy
A self-hostable personal dashboard built for you. Includes status-checking, widgets, themes, icon packs, a UI editor.
More information Link
1.. Create the folder where you will creat the configuration file and create the conf.yml.
1
2
3
4
5
6
7
8
9
10
11
12
13
14
15
16
17
18
19
20
21
22
23
24
25
26
27
28
29
30
31
32
33
34
35
36
37
38
39
40
41
42
43
44
45
46
---
pageInfo:
  title: Hello, impulsado
  description: Dashboard
  logo: https://avatars.githubusercontent.com/u/72570835?v=4
appConfig:
  statusCheck: false
  theme: dashy-docs
  fontAwesomeKey: c94dc2b452
  customCss: '.clock p.time { font-size: 3rem !important; }'
  layout: vertical
  iconSize: medium
  language: es
sections:
  - name: Today
    icon: far fa-smile-beam
    displayData:
      collapsed: false
      hideForGuests: false
    widgets:
      - type: clock
        id: 0_513_clock
  - name: Selfhosted
    icon: far fa-code
    items:
      - title: AdGuard
        icon: si-adguard
        url: http://192.168.1.81:3000/
      - title: Nginx Reverse Proxy
        icon: si-nginx
        url: http://192.168.1.81:81/
      - title: Portainer
        icon: si-portainer
        url: http://192.168.1.81:9000/
      - title: Vaultwarden
        icon: si-bitwarden
        url: https://pass.impulsado.org
      - title: Cloudflare
        icon: si-cloudflare
        url: https://www.cloudflare.com/
      - title: wannaNotes
        icon: si-github
        url: https://www.notes.impulsado.org/
      - title: Router
        icon: si-pfsense
        url: http://192.168.1.1/homeAuthentication.html---
2.. Go to Portainer and create a new stack.
1
2
3
4
5
6
7
8
9
10
11
12
13
14
15
---
version: "2.1"
services:
  dashy:
    image: lissy93/dashy
    container_name: Dashy
    volumes:
      - /home/pi/Programs/Dashy/conf.yml:/app/public/conf.yml
    ports:
      - 4000:80
    environment:
      - NODE_ENV=production
      - UID=1001
      - GID=100
    restart: unless-stopped
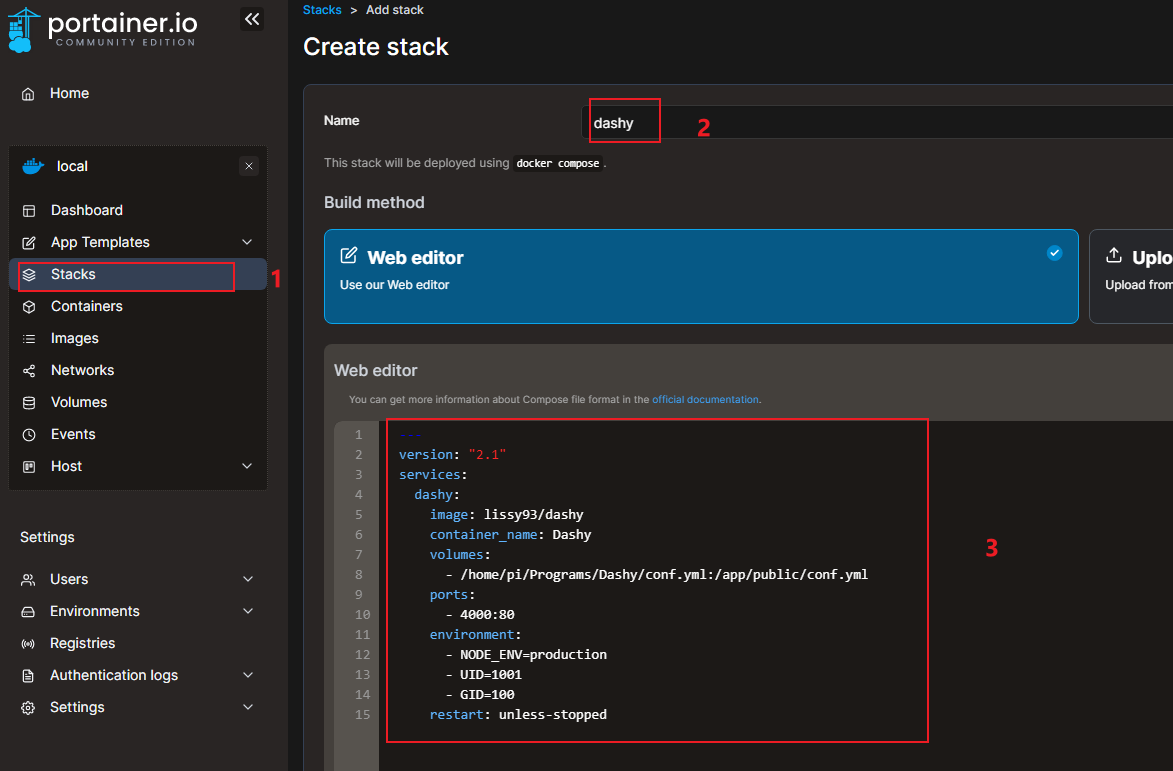
3.. Now you can access to the Dashboard (IP:4000)
Further Investigations
- SSL Certificates
- Backups
- Manage Logs
- Fail2Ban
Sources
- Pi-Hosted Project: https://github.com/novaspirit/pi-hosted
- Self-Hosted Docker setups: https://github.com/abhilesh/self-hosted_docker_setups
- Selfhosted Reddit: https://www.reddit.com/r/selfhosted/